Experiment 2: Random
Mutagenesis
Overview:
You will be using Strategene’s GeneMorph reagents and protocol in this experiment. A PDF file of the manual is on the class website. You are going to use error prone PCR to introduce random mutations into a portion of the A. nidulans nimX gene (from position 4689 to 5626 in pNIG6). You will use primers flanking this region to perform PCR under error prone conditions provided by the GeneMorph kit, generating a PCR product that contains multiple mutations per kb (take note of the various reaction conditions that promote error prone PCR in your reading). You’ll then purify this mutation-ridden, double stranded PCR product and use it as “megaprimers” to PCR amplify a wild type pNIG6 plasmid under high fidelity conditions (reaction conditions analogous to that of the QuickChange procedure). This will result in synthesis of pNIG6 plasmids potentially containing mutations in the region corresponding to the mutant megaprimer. You’ll test the function of two of the mutagenized pNIG6 plasmids you have generated by transforming them into an A. nidulans strain containing a mutant version of nimX. If your mutant pNIG6 plasmid cannot complement the nimX mutation in A. nidulans, then you have created a new nimX mutation. The region amplified under error prone conditions contains the nimX promoter, all of exon 1, intron 1, and most of exon 2. Hypothesize how mutations in each of these genetic elements could inactivate the function of nimX as part of your discussion of this experiment in your lab notebook.
Chronological Protocol:
1. Each group performs one Mutant Megaprimer mutagenesis reaction using the oligos “domain 5” and “domain 3”.
The TAs will prepare a master mix containing everything except oligonucleotides, pNIG6 DNA, and enzyme. Each group will receive 46 ul of master mix.
Master mix, all reagents, and the reaction are kept on ice.
All groups add 1 ul of each primer (125 ng/ul of each primer)
Groups 1 and 5 will add 90 ng of pNIG6 (1 ul of 90 ng/ul pNIG6)
Groups 2 and 6 will add 9.0 ng of pNIG6 (1 ul of 9.0 ng/ul pNIG6)
Groups 3 and 7 will add 0. 9 ng of pNIG6 (1 ul of 0.9 ng/ul pNIG6)
Groups 4 and 8 will add 0.09 ng of pNIG6 (1 ul of 0.09 ng/ul pNIG6)
TAs will add 1 ul of enzyme to each reaction and start the PCR. No oil will be added to the reactions.
2. Each group will purify their Mutant Megaprimers using a Qiagen QIAquick PCR Purification Kit.
Note: This protocol is designed to purify single- or double-stranded DNA fragments from PCR and other enzymatic reactions (see page 8). For cleanup of other enzymatic reactions, follow the protocol as described for PCR samples or use the new MinElute Reaction Cleanup Kit. Fragments ranging from 100 bp to 10 kb are purified from primers,
nucleotides, polymerases, and salts using QIAquick spin columns in a microcentrifuge. Notes: All centrifuge steps are at high speed in a conventional tabletop microcentrifuge.
a) Add 5 volumes of Buffer PB to 1 volume of the PCR sample and mix. For example, add 500 μl of Buffer PB to 100 μl PCR sample (not including oil).
b) Place a QIAquick spin column in a
provided 2 ml collection tube.
c) To bind DNA, apply the sample to
the QIAquick column and centrifuge for 30–60 s.
d) Discard flow-through. Place the QIAquick column back into the same tube. Collection tubes are re-used to reduce plastic waste.
e) To wash, add 0.75 ml Buffer PE to
the QIAquick column and centrifuge for 30–60 s.
f) Discard flow-through and place
the QIAquick column back in the same tube. Centrifuge the column for an
additional 1 min.
IMPORTANT: Residual ethanol from Buffer PE will not be completely removed unless the flow-through is discarded before this additional centrifugation.
g) Place QIAquick column in a clean
1.5 ml microcentrifuge tube with the lid cut off.
h) To elute DNA, add 50 μl
Buffer EB (10 mM Tris·Cl, pH 8.5) or H2O to the center of the QIAquick membrane
and centrifuge the column for 1 min. Alternatively, for increased DNA
concentration, add 30 μl elution buffer to the center of the QIAquick
membrane, let the column stand for 1 min, and then centrifuge.
i) Transfer eluted DNA to a clean,
labeled 1.5 ml microfuge tube.
IMPORTANT: Ensure that the elution buffer is dispensed directly onto the QIAquick membrane for complete elution of bound DNA. The average eluate volume is 48 μl
from 50 μl elution buffer volume, and 28 μl from 30 μl elution buffer. Elution efficiency is dependent on pH. The maximum elution efficiency is achieved between pH 7.0 and 8.5. When using water, make sure that the pH value is within this range, and store DNA at –20°C as DNA may degrade in the absence of a buffering agent. The purified DNA can also be eluted in TE (10 mM Tris·Cl, 1 mM EDTA, pH 8.0), but the EDTA may inhibit subsequent enzymatic reactions.
3. Each group will quantify their Mutant Megaprimers by measuring abosrobance at 260nm using a NanoDrop device and by agarose gel electrophoresis using Invitrogens 1kb plus DNA Ladder. Run 5 ul of your purified primer on a standard agarose gel. To prepare your sample for agarose gel electrophoresis, mix 5 ul of purified DNA, 1 ul of 10X loading buffer, and 4 ul of ddH2O together and load in a single lane. The TA’s will set up a common gel on the front lab bench and each group will load its sample. Lane1 = MW Marker. Lane 2 = Group 1. Lane 3 = Group 2,...etc. Tell PM or the TAs when you are done loading the gel and the TAs will take your purified primer samples and measure the DNA concentration. They will give you a photo of the result for your notebook.
4. Each group will perform an EZClone PCR reaction using their gel isolated Mutant Megaprimer. The TAs will prepare a master mix containing everything except your Mutant Megaprimers (each reaction has 2 ul of a 25 ng/ul pNIG5 stock). Each group will receive 29 ul of master mix. Each student should have the entire reaction recipes for the control and their own EZClone reaction (including what’s in the master mix) in his/her notebook (see the GeneMorph Manual).
The maximum volume you can add to the master mix is 21 ul.
Each group will add their 250 ng Mutant Megaprimer to their reaction.
If 21 ul of your purified Megaprimer PCR product does not contain 250 ng of DNA, then add 21 ul of your PCR product and nothing else.
If 250 ng of your Mutant Megaprimer is contained in less than 21 ul, then add additional ddH20 to bring the total reaction volume up to 50 ul.
TAs will collect the reactions and start the PCR and then store the completed reactions for you. No oil will be added to the reactions.
5. Each group will remove 20 ul of their PCR reaction to a 1.5 ml tube, add 1 ul DpnI, and incubate at 37 degrees for 1 hour. Save the undigested PCR reaction in a labeled 1.5 ml tube in your -20 box.
6. Each group will transform XL10-Gold cells with their EZClone Reaction products using the protocol in the user manual.
a) The TAs will provide you with 45 μl of the ultracompetent cells in a14-ml BD Falcon polypropylene tube on ice. They will also provide you with 4 ul of XL10-Gold β-mercaptoethanol mix (β-ME) on ice. They will also provide you with 1 ml of NZY+ medium in tubes in the 42 degree water baths.
b) Add 2 μl of the XL10-Gold β-mercaptoethanol mix (β-ME) to the 45 μl of cells.
c) Swirl the contents of the tube gently. Incubate the cells on ice for 10 minutes, swirling gently every 2 minutes. KEEP THE CELLS ICE COLD EVEN DURING SWIRLING!
d) Transfer 1.5 μl of the Dpn I-treated DNA from each control and sample reaction to separate aliquots of the ultracompetent cells.
e) TAs will perform a control transformation to verify the transformation efficiency of the XL10-Gold ultracompetent cells. TAs, add 1 μl of 0.01 ng/μl pUC18 control plasmid (diluted 1:10 in high-quality, sterile water) to a separate 45-μl aliquot of the ultracompetent cells. Add 2 μl of the XL10-Gold β-mercaptoethanol mix (β-ME) to the 45 μl of cells. Swirl the transformation reactions gently to mix and incubate the reactions on ice for 10 minutes. Continue as below except use L-AMP plus XGAL and IPTG plates.
f) Heat-pulse the tubes in a 42°C water bath for 30 seconds. The duration of the heat pulse is critical for obtaining the highest efficiencies. Do not exceed 42°C.
g) Incubate the tubes on ice for 2 minutes.
h) Add 0.5 ml of preheated (42°C) NZY+ broth to each tube, then incubate the tubes at 37°C for 1 hour with shaking at 225–250 rpm.
i) After the hour incubation, vortex the cells, pipet 50 ul of cells into the tube containing .45 ml of NZY+ to make a 1:10 dilution of the transformation mixture.
j) Plate 250 ul of the 1:10 dilution of the transformation mixture on one L-AMP plate.
k) Plate 250 ul of the udiluted transformation mixture on one L-AMP plate.
l) Incubate plates at 37 degrees. The TAs will store the plates at 4 degrees after colonies have grown to an appropriate size. Plates will be ready for you at the start of the next lab period. [ Note to TAs: make L-AMP plates containing Xgal and IPTG. Pick 6 colonies from each group’s plates and inoculate 2 ml of L-AMP in culture tubes and incubate tubes shaking overnight at 37 degrees the night before the next lab period. Bring the culture tubes and plates to the lab]
7. Each group will do 6 miniprep DNA isolations on clones from their GeneMorph reaction using Qiagen kit reagents (protocol from Qiagen manual inserted below).
a) Transfer ~1.5 mls of each cell culture into labeled, 1.5 ml centrifuge tubes.
b) Harvest the bacterial cells by centrifugation in a the microcentrifuge at
full speed for 1 min at room temperature (15–25°C).
c) 1. Resuspend pelleted bacterial cells in 250 μl Buffer P1 containing
RNase.
d)
Add 250 μl Buffer P2 and mix thoroughly by inverting the tube 4–6 times. Mix gently by inverting the tube. Do not vortex, as this
will result in shearing of genomic DNA. If necessary, continue inverting the
tube until the solution becomes viscous and slightly clear. Do not allow the
lysis reaction to proceed for more than 5 min.
e)
Add 350 μl Buffer N3 and mix immediately and thoroughly by inverting the
tube 4–6 times. To avoid localized precipitation, mix the solution
thoroughly, immediately after addition of Buffer N3. Large culture volumes
(e.g. ≥5 ml) may require inverting up to 10 times and vigorous shaking.
The solution should become cloudy.
f)
Centrifuge for 10 min at full speed in a table-top microcentrifuge. A compact white pellet will form.
g) Apply the supernatants from step 4 to the
QIAprep spin column by pipetting. Label
the tops of the spin columns.
h) Centrifuge for 30–60 s at full
speed. Discard the flow-through.
i) Wash QIAprep spin column by
adding 0.75 ml Buffer PE and centrifuging for 30–60 s at high speed.
j) Discard the flow-through, and centrifuge for an additional 1 min to remove residual wash buffer. Important: Residual wash buffer will not be completely removed unless the
flow-through is discarded before this additional centrifugation. Residual ethanol from Buffer PE may inhibit subsequent enzymatic reactions.
h) Place the QIAprep column in a clean 1.5 ml microcentrifuge tubes that have the lid cut off (use scissors). To elute DNA, add 50 μl Buffer EB (10 mM Tris·Cl, pH 8.5) to the center of each QIAprep spin column, let stand for 1 min, and centrifuge for 1 min at high speed.
j) Transfer the DNA solution to a clean, labeled, 1.5 ml microcentrifuge tube and store on ice. NOTE: there is no EDTA in EB, so keep the DNA cold to minimize the effects of any contaminating nucleases.
8. Each group will digest each miniprep DNA with XbaI plus PstI in NEB Buffer 3 plus BSA to check that large deletions or insertions have not occurred. TAs will supply you with pNIG6 DNA at 0.2 ug/ul, and a tube containing a Master Mix containing buffer and enzyme for your digest.
a) Distribute 35 ul of master mix to each of 7, 1.5 ml microfuge tubes.
b) Add 5 ul of each miniprep DNA to one tube.
c) Control Reaction: Add 4 ul ddH20 to the last tube and 1 ul of pNIG6.
d) Incubate reactions at 37 degrees for 1 hour.
9. Each group runs all seven (7) reactions along with markers on a 1% gel and gets photo of result. Record and analyze your results in your lab notebook. [Note to TAs: prepare gels, have Master mix aliquots ready at the start of this lab period.]
a) Add 4 ul of 10X loading buffer to each digest.
b) Load 15 ul of the reaction on a gel.
c) Load 5 ul of DNA MW Markers in one lane.
d) Run until the blue dye is near the bottom of the gel ! 45 minutes.
10. Each group will transform two of their pNIG6 mutants into an Aspergillus strain carrying a null mutation of pyrG and a temperature sensitive mutation of nimX in order to determine if null alleles of nimX were created. This strain cannot form colonies on plates lacking uracil because of the pyrG mutation. This strain cannot form colonies on uracil containing medium at 42 degrees because of the heat-sensitive nimX mutation. All plasmids resulting from the GeneMorph protocol should contain a wild type pyr+ gene that complements the pyrG mutation of the Aspergillus strain, allowing you to select for transformants by their ability to form a colony on medium lacking uracil. Plasmids in which nimX has been inactivated will produce tranforants that can grow at 32 degress but not at 42 degrees. Choose two plasmids that do not have large deletion or insertion mutations. Note the identity of the plasmids used in your transformations (remember to name your plasmids properly and save them).
11. Aspergillus transformation protocol.
Each group will be provided with Aspergillus nidulans cells competent to be tranformed. The transformation is based on the pyr4 gene in pNIG6, which complements the uracil auxotrophy of the A. nidulans strain provided. These cells are protoplasts (aka spheroplasts – cells without cell walls) and must be maintained in an iso-osmotic solution until they regenerate their cells walls after the transformation procedure is completed.
A) 100 ul of cells in a sterile, 2 ml, snap cap tubes will be provided to you by the TAs. Keep the tube on ice. Each tube of 100 ul cells is to be used in one transformation. You will be doing one or two transformations, depending on the availability of cells (note that you will be transforming with DNA from this lab and the next lab on the same day).
B) Add 10 ul of your mutated pNIG6 clone plus 2 ul of pHELP (helper plasmid) DNA to the cells. Mix gently by re-pipetting 5 times.
pHELP is a plasmid that can replicate in Aspergillus but which does not
have a selectable marker on it. DNA
molecules often recombine during transformation, forming larger plasmids that
are multiple copies of the input DNA. In
this case, we select combinations that include at least one pNIG6 and one pHELP
by selecting for the pyr+ gene on pNIG6 and for the ability to replicate in A.
nidulans. The combined plasmids are
referred to as “cointegrates”. IF you
want to read more about this A. nidulans-specific transformation system, search
“AMA1” and “Aspergillus” on PUBMED.
C) Add 50 ul of 20% PEG. Mix gently by re-pipetting 10 times. Incubate on ice for at least 20 minutes (longer is OK).
D) Add 1 ml PEG. Mix by inverting the tube until the solution has coated the whole tube. Incubate at room temperature for 20 minutes, mixing by inverting the tube several times every 5 minutes.
E) Plate the transformation solution onto four plates. For each plate, pipet 270 ul of the transformation mix into 3 ml molten Aspergillus top-agar medium lacking uracil (YG KCl). [Note to TAs: Prepare 4 tubes of 3 ml top agar medium per group plus 8 tubes for me and have ready in 50 degree water baths.] Immediately mix by vortexing vigorously for 5 seconds and pour the entire contents of the tube onto one petri plate containing medium lacking uracil (YG KCl). Plate four plates with 270 ul each (most of the transformation mixture will be used up). Note to students: don’t pour water bath water into your plates – wipe the water off the outside of the tubes before dumping their contents onto the plate. The TAs will do positive and negative control transformations. Positive control = 2 ug of pHELP plus 5 ug of pNIG6. Negative control = 2 ug of pHELP.
F) Incubate the plates face up on your bench overnight. The TAs will transfer the plates to 32 degree incubators in my lab the next day and will bring the plates to you the following lab session. Note that incubation at 32 degrees allows all transformants to form colonies on YG KCl medium, regardless of whether they contain plasmids with a functional nimX gene.
G) Patch up to 20 of your Aspergillus transformants from each GeneMorphed plasmid onto each of two petri plates (YG). Include one positive control and negative control colony from the TAs plates. Incubate one plate at 32 degrees (all transformats should form colonies) and the other at 42 degress (only those transformats that received a plasmid with a functional nimX gene will form colonies). The TAs will take your plates and put them in an appropriate incubator and return them to you at the next lab period. Most of the transformants from one plasmid will behave the same (growth at both 32 and 43 or just at 32), allowing you to determine whether that plasmid contained a functional nimX gene.
12. Record and Discuss Results
Each student should calculate the amount of
target DNA added to your mutagenic PCR reaction. The target DNA is the region of the pNIG6
plasmid that will be mutated, which is the region of pNIG6 that is amplified
with primers domain 5’ and domain 3’.
The size of this amplicon is calculated as part of your Vector NTI
exercises as is the size of whole pNIG6 plasmid. As explained in the GeneMorph manual: “The initial
amount of target DNA required to achieve a particular mutation frequency refers
to the amount of target DNA to amplify, not the total amount of plasmid DNA
template to add to the reaction. As an example, to
mutagenize a 1.0-kb target gene at a low mutation frequency, an initial target
amount of 500 ng is recommended. For a 1.0-kb target gene that is an insert in
a 3.0-kb plasmid (the total construct is 4.0 kb), 2 μg
of the plasmid construct should be added to the reaction to provide 500 ng of
target DNA.”
Your notebook should show the calculation of how much target DNA you added to your mutagenic PCR reaction given the amount of pNIG6 DNA added.
XL10-Gold Transformation: Each student should calculate their group’s transformation efficiency (= number of transformants per ug of pNIG6 DNA added to the cells) and record that information in the notebook. To perform this calculation, you’ll have to calculate how much pNIG6 DNA was present in the 1.5 ul of the DpnI digest you transformed into XL10-Gold cells. Record your group’s results on the blackboard and copy down the results from all the groups, including the control transformation done by the TAs. How do your results compare with the transformation efficiency advertised by Stratagene? How do they compare with the other groups? What are the factors that could contribute to differences between your calculated efficiency compared to Stratagene’s advertised efficiency? Between your efficiency and that of other groups?
Mutagenesis Efficiency: Each student should also record the mutagenesis efficiency of the control reaction run the by TAs (efficiency = percent of E. coli transformants that contain mutant plasmid). To do this, you will have to consult the GeneMorph manual to learn what the control reaction was and how you would use the blue/white colony color assay to determine which colonies carry mutant plasmid and which carry wild-type plasmid. Also record the mutation efficiency obtained by your group and all other groups (record information of the blackboard). In this case, the total number of plasmids analyzed is 2, and the percentage of mutants = (# mutants/2)*100. Each student should consider the different type of mutations in the region of nimX corresponding to the Mutant Megaprimer that would produce a null allele. To do this, consider the different parts of the nimX gene represented in that region (use Vector NTI) and then how mutations in each of those different parts could inactivate nimX function. Discuss the possible types of mutations in your discussion of this experiment and how would you determine the exact nature of any new mutant alleles created?
DNAs:
Plasmids: 1000, 10, 1, 0.1, 0.01 ng/ul pNIG6. 2 ug/ul pHELP DNA. 2 ug/ul pAID DNA. Oligonucleotides: domain 5’ and domain 3’, each at 125 ng/ul.
MW Markers: 1 kb plus ladder (Invitrogen). [Note to TAs: Make 8, 3 ul aliquots of 8 ng/ul pNIG6 and 8, 3 ul aliquots of each oligo primer, and x ul of the MW markers (one tube each per group. Give me the 1 ug/ul pNIG6 tube for the Aspergillus transformation lab)]
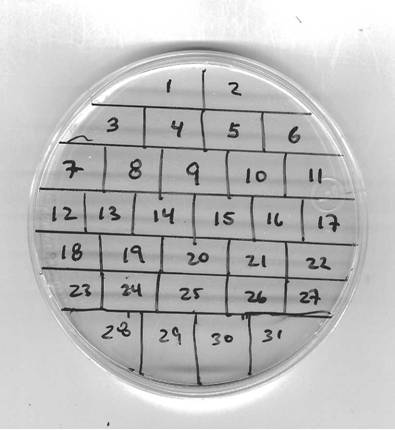
Grid for pathing
Aspergillus transformants
-